
 Twitter
 Slack
Slack RSS
RSS GitHub
Blog
Kind-ly running Contour
Jul 11, 2019
kind is a tool for running local Kubernetes clusters using Docker container “nodes.” Primarily designed for testing Kubernetes 1.11 or later, kind is initially targeting the upstream Kubernetes conformance tests, which are run to verify if a cluster meets standard expectations. It is also an excellent tool for creating a Kubernetes cluster locally on many platforms (Linux, macOS, or Windows), especially since it can create multi-node clusters quickly and reliably.
This blog post demonstrates how to install kind, create a cluster, deploy Contour, and deploy a sample application, all locally on your machine which enables running applications locally the same way they are deployed to production.

Example of a four worker node cluster with a single control plane.
Here’s a quick video demonstration of how to install kind, create a cluster, deploy Contour, and deploy a sample application.
Install Kind
There are a number of ways to install kind. Here is a simple way to grab the latest release for a Darwin architecture. The following commands downloads the latest binary, makes it executable, and moves it to your local bin path.
Note: You may want to update some portions of the commands to match your local operating system and configuration.
$ curl -Lo ./kind-darwin-amd64 https://github.com/kubernetes-sigs/kind/releases/download/v0.6.0/kind-darwin-amd64
$ chmod +x ./kind-darwin-amd64
$ sudo mv ./kind-darwin-amd64 /usr/local/bin/kind
Create a Cluster
Now that we have kind installed, let’s create a cluster. Running the command kind create cluster generates a single node cluster. This command is the simplest way of creating a cluster, but for this example, we want to pass an additional configuration to the cluster creation step to map Ports 80 on the Kubernetes worker node to Port 80 on the local Docker network.
Save the following yaml to a file named kind.config.yaml and run the create cluster command:
$ kind create cluster --config kind.config.yaml
# Save to 'kind.config.yaml'
kind: Cluster
apiVersion: kind.sigs.k8s.io/v1alpha3
nodes:
- role: control-plane
- role: worker
  extraPortMappings:
  - containerPort: 80
    hostPort: 80
    listenAddress: "0.0.0.0"
  - containerPort: 443
    hostPort: 443
    listenAddress: "0.0.0.0"
Note: You can only have a single worker with this configuration because you can’t map multiple Docker containers (i.e., worker nodes) to the same port on a single Docker instance.
After the cluster comes up, you should have two nodes in the cluster, a worker node and a control plane node:

Deploy Contour
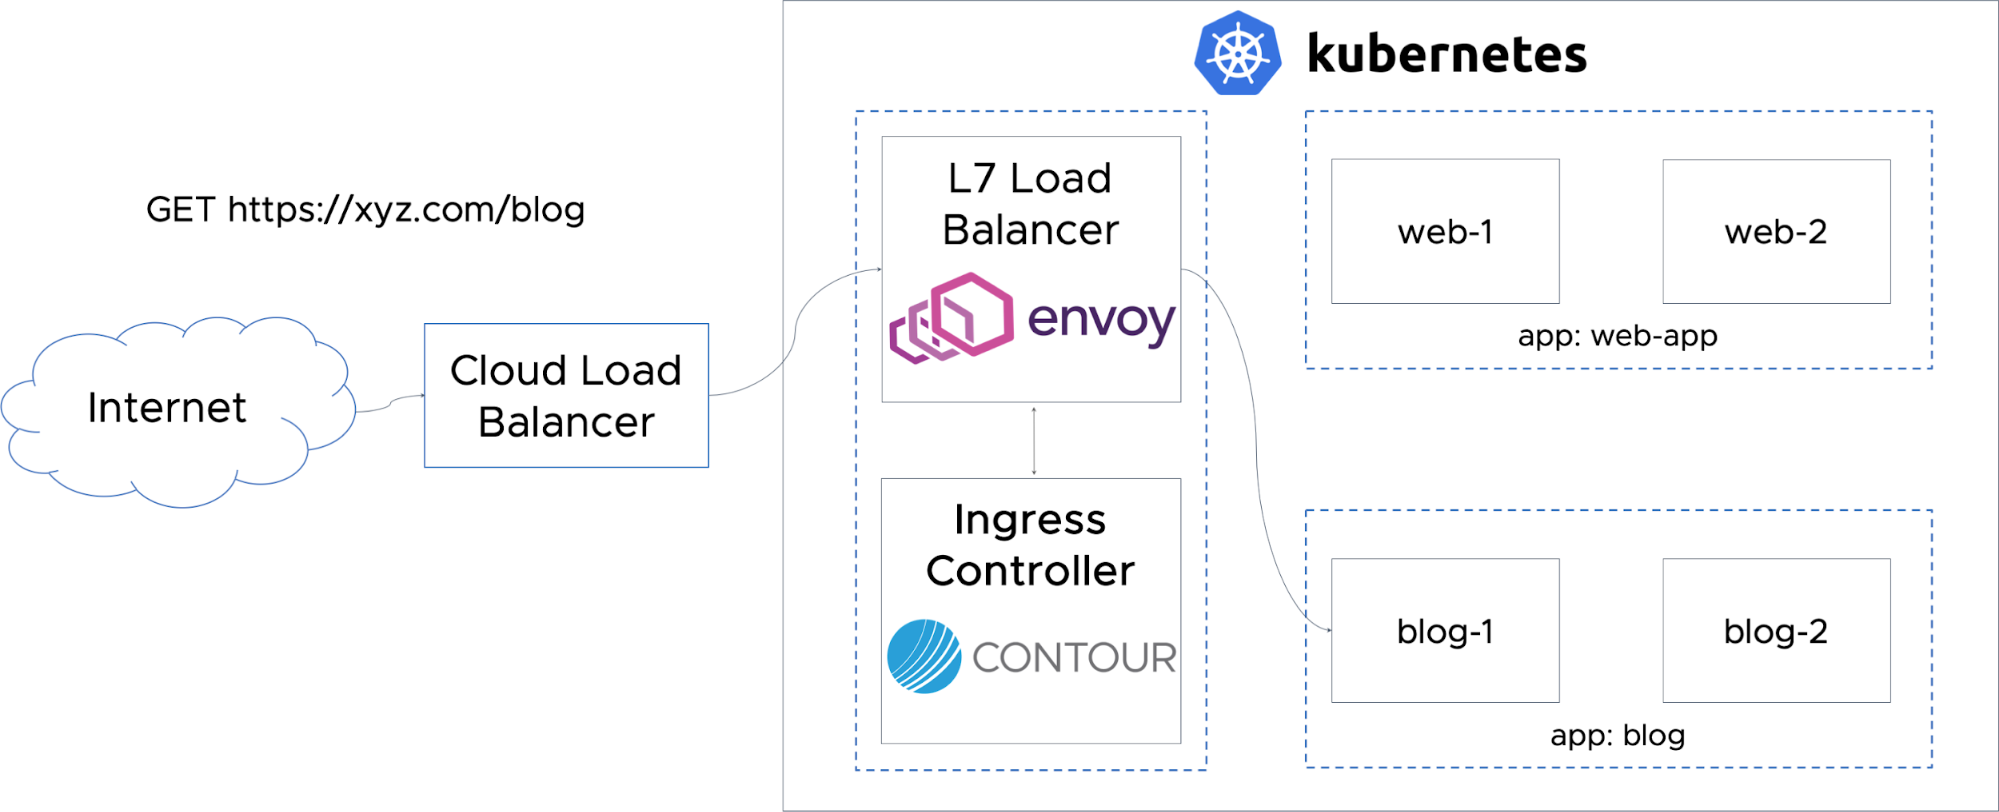
Next, we’ll deploy Contour into our freshly created cluster. We are going to use a “split” deployment, which configures Envoy as a DaemonSet.
Contour is the configuration server for Envoy — Contour, that is, exposes an xDS API for Envoy. Contour watches the Kubernetes cluster for changes to services, end points, secrets, ingress, and HTTPProxies. Contour generates a set of configurations that is streamed to Envoy via the xDS gRPC connection. All data travels through Envoy, which is running on every node in the cluster (a single node in our example).
Additionally, the Envoy DaemonSet will be configured to use HostNetworking to bind Envoy’s ports directly to the worker node.
Deploy contour:
$ git clone https://github.com/projectcontour/contour.git
$ kubectl apply -f contour/examples/contour
Since our deployment of kind is binding ports 80 and 443 to our laptop, when we curl localhost:80 or localhost:443, the request will arrive at the Envoy pod. But to enable Envoy to route these requests, we need to deploy some ingress resources, which we will do as part of deploying the sample application.
Deploy the Sample Application
Finally, we’ll deploy a sample application to to verify the network ingress path is functional to an application. By deploying this way, we are matching how we would deploy an application in production within Kubernetes, so any testing done locally inside the kind cluster should match how the application will perform once deployed. Since we already cloned the Contour repo in the previous step, let’s deploy the
kuard sample application, which is an example workload in the repo.
Deploy the application:
$ kubectl apply -f https://projectcontour.io/examples/kuard-httpproxy.yaml
Now that the application is up and running, we need a way to route to it. The sample we just deployed uses kuard.local for the domain name.
apiVersion: projectcontour.io/v1
kind: HTTPProxy
metadata:
  labels:
    app: kuard
  name: kuard
  namespace: default
spec:
  virtualhost:
    fqdn: kuard.local
  routes:
    - conditions:
      - path: /
      services:
        - name: kuard
          port: 80
Let’s create an entry in our local /etc/hosts to route kuard.local to 127.0.0.1 (i.e., Envoy running in kind).
##
# Host Database
#
# localhost is used to configure the loopback interface
# when the system is booting.  Do not change this entry.
##
127.0.0.1          localhost
255.255.255.255    broadcasthost
::1                localhost
127.0.0.1          kuard.local   # <--- add this!
Now open a browser and go to: http://kuard.local
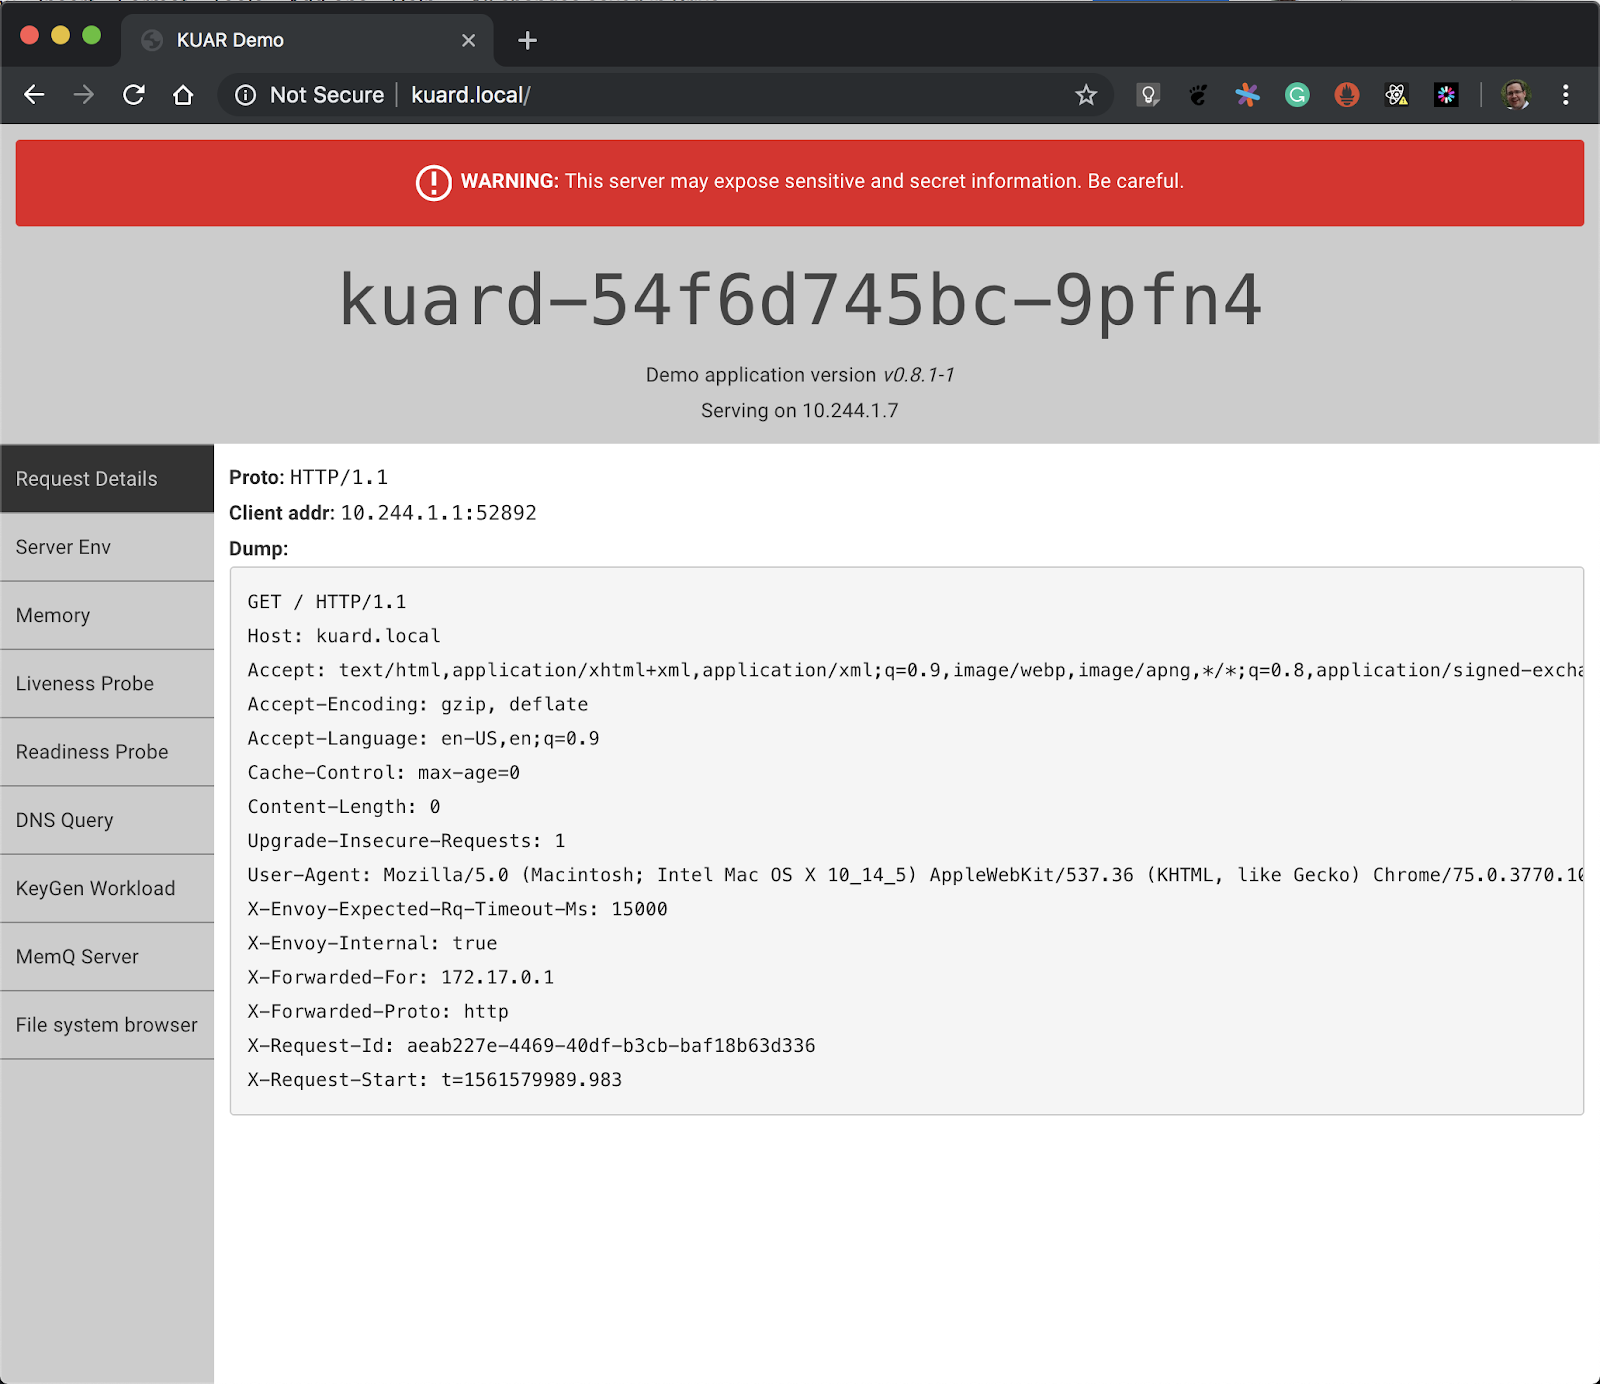
What’s happening is that the request to http://kuard.local is resolved to 127.0.0.1 via the entry the /etc/hosts file. That request is then sent to Envoy running on the single Kubernetes worker node in the kind cluster. Envoy is configured to send any request to kuard.local/ to the kuard application in the cluster. The request then gets routed to an instance of kuard and the response is sent back to the user.
This blog post helps you enable Contour in your local development environment by allowing you to match the way you’d deploy your application in production. Any testing done locally inside the kind cluster should match how the application will perform once deployed reducing the time required testing in production. I hope this blog post better equip your usage of Contour!
Related Content
Routing Traffic to Applications in Kubernetes with Contour
One of the most critical needs in running workloads at scale with Kubernetes is efficient and smooth traffic ingress management at the Layer 7 level.